mycookiefactory

It was my husband’s 32nd birthday this week and what better way to say ‘Happy Birthday’ to your loved one than making him a heart shaped birthday cake. The writing leaves a bit to be desired, but surely I can improve that when getting more  practice. The inside of the cake is quite fabulous though with its raspberry, vanilla and chocolate layers held together by creme patisserie.


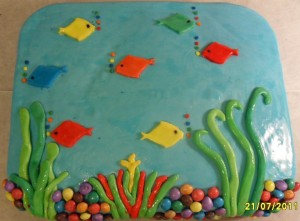
I recently forced myself over my fear of decorating with sugar paste and started trying again.  The first time I ever tried it was very difficult and I was not sure if I would be able to get the hang of it. I tried and I succeeded.

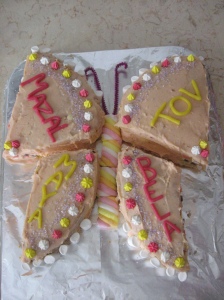
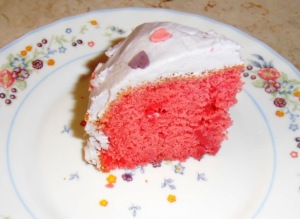
The butterfly was a red velvet cake with a bright red coconut vienna cream filling and the fish cake a dense, moist chocolate cake.


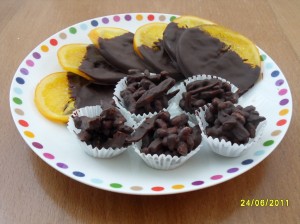
I was in the mood to try some new things with candied orange. I’m not a huge fan, but both my husband and my sister totally love the stuff, so that was more than enough reason to get creative.

The slices of orange were dipped in 70% dark chocolate. Nothing more, nothing less. That was enough to make them delicious.

I used the same chocolate to make orange peel Rice Crispie treats. They were so good that my 3 year old couldn’t get enough of them. Not your typical choice for a little one, but he likes a lot of outspoken flavours.

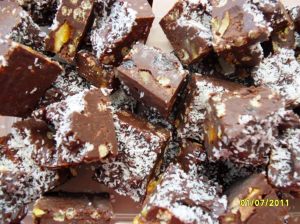
Using more or less the same recipe as for the cherry fudge I bought candied orange peel (I could make my own, but honestly, who has the time and energy?!) and added this into the chocolate-condensed milk mix. To add some more flavour I also added some raisins and to make the texture a bit more interesting I added a cup or so of sugar puffs. Here’s the result. It was very well received by everyone who tasted it.

Ingredients

  • 1-1/2 teaspoons plus 1 tablespoon butter, divided
  • 150 gr semisweet chocolate
  • 150 gr milk chocolate
  • 1 can (14 ounces) sweetened condensed milk
  • 3/4 cup chopped orange peel
  • 1/2 cup raisins
  • 1 cup sugar puffs
  • 1 teaspoon natural orange extract
  • shredded coconut

Directions

  • Line an 11-in. x 7-in. pan with foil (or parchment paper) and grease the foil with 1-1/2 teaspoons butter (no need to butter when using paper); set aside.
  • In a heavy saucepan, melt the chocolate and remaining butter over low heat; stir until smooth. Remove from the heat; stir in the milk, dry ingredients  and extracts until well blended. Spread into prepared pan. Sprinkle with coconut. Refrigerate until set (2hrs maximum).
  • Using the foil, lift fudge out of the pan. Discard the foil; cut fudge into 1-in. squares. Store in the refrigerator. Yield: about 2-1/2 pounds.

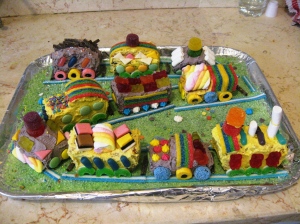
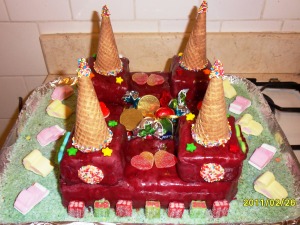
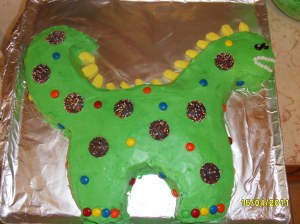
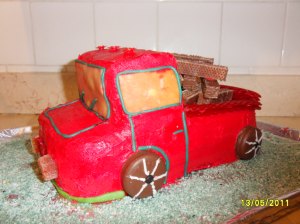
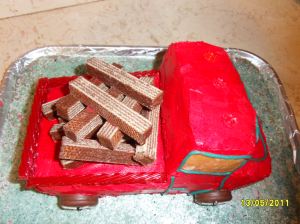
About a year and a half a go a friend’s daughter had her 2nd birthday. I thought it would be a nice idea to make her a birthday cake. Not just any old round chocolate cake with sprinkles on it, but a novelty cake. A butterfly to be precise. This was to fit the theme of the birthday and who doesn’t like butterflies?

This cake turned out to be such a hit that soon I was getting requests from other friends if I could do cakes for them as well.

Now I never had any formal training decorating cakes, so there was a lot of trial and error involved, but every cake I made turned out better than the last. Today I have reached a point where can safely say that my cakes taste amazing and look great.

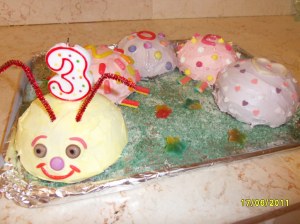
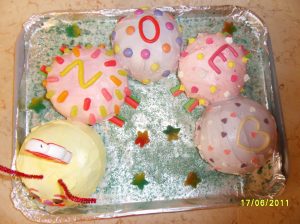
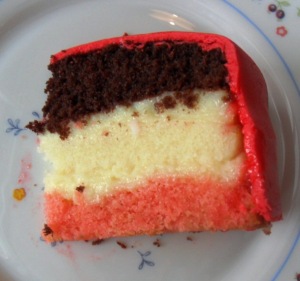
I am not going to write recipes for every came I made, but I have made the following flavors (in theory any flavor known to mankind is possible for these cakes): chocolate, chocolate marble, chocolate orange, lemon, vanilla and raspberry. I make every cake from scratch to guarantee great quality and moistness and use only natural flavoring. A cake that is not a chocolate cake can be any color under the rainbow. For instance: The caterpillar was made of 3 bright pink and 2 pastel pink parts. It looks gorgeous and both the kids and the adults loved it. All these cakes are more than enough to feed around 25 kids and any parent who fancies a piece. Smaller cakes are of course possible as well.


If you want more details on the cakes, please don’t hesitate to email me.

I wanted to make something nice for my son’s daycare center as we are having family day on Friday and I saw a recipe for chocolate mint fudge. As a lot of people (and especially small kids) are not too keen on the combination of mint and chocolate, I decided to get creative with the recipe. A bit of a dare as it was going to be my first time making fudge! With Valentine’s Day coming up I thought it would be nice to make the fudge cherry flavored.

Turns out that making fudge is about the easiest thing in the world. With a few simple ingredients and in less ten 10 minutes (without the chilling time) you can make a real good tray of fudge in your own favorite flavor!

This is how I did it:

Ingredients

  • 1-1/2 teaspoons plus 1 tablespoon butter, divided
  • 3 cups (18 ounces) semisweet chocolate chips
  • 1 can (14 ounces) sweetened condensed milk
  • 1/2 cup chopped maraschino cherries
  • 1 teaspoon cherry extract
  • 1 teaspoon vanilla extract
  • shredded coconut

Directions

  • Line an 11-in. x 7-in. pan with foil and grease the foil with 1-1/2 teaspoons butter; set aside.
  • In a heavy saucepan, melt the chocolate chips and remaining butter over low heat; stir until smooth. Remove from the heat; stir in the milk, cherries and extracts until well blended. Spread into prepared pan. Sprinkle with coconut. Refrigerate until set (2hrs maximum).
  • Using the foil, lift fudge out of the pan. Discard the foil; cut fudge into 1-in. squares. Store in the refrigerator. Yield: about 2-1/2 pounds.

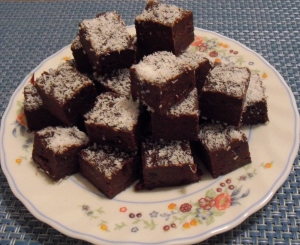
And this is the final result:

My little guy decided it was time to bake cookies again. He makes himself this promise about every other week, which keeps me busy and him happy and vice versa, since we both love to bake and eat cookies.  As I was not in the mood at all for another batch of sugar cookies in the shape of numbers covered with sickly sweet sprinkles I looked for a recipe that required a cookie cutter and would be fun for a toddler to help out with (read: ‘continuously eat the dough to see if it doesn’t taste bad’)

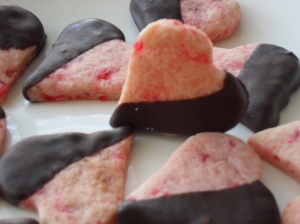
I loved a few things about this recipe: The dough was an absolute delight to work with. Easy, not sticky and kept its shape beautifully. The maraschino cherries gave the dough a wonderful pink color, so there was no need for added artificial coloring. The recipe asks for very little sugar, but still the cookies taste great. The recipe is quick and easy and the result stunning. Every single person that saw and tasted these cookies couldn’t get over how great they are.
I experimented with the chocolate dipping. I dipped some like in the original picture, but some the top half and some the bottom half. They came out looking real good! I will use this recipe again and again, especially if I want to bake something for someone as a present.


Having a 2.5 year old in the house makes you have to take Hanukkah very serious. He learned all about it on daycare, so it was time to pull out all the stops at home too.

Besides making him a clay Hannukia in the shape of a caterpillar and making the traditional latkes with applesauce, I organized a Hanukkah picnic for our Mommy& Me group. This of course gave me the perfect reason to get into the kitchen and get baking!

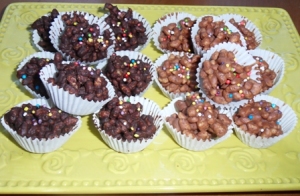
First of all, I made chocolate Rice Krispies Clusters, which basically just means melting 100gr chocolate with a spoon of butter and mixing in a cup of Rice Krispies. I made two batches, the one with milk chocolate to which I added some natural orange flavor (drops) and one batch with dark chocolate to which I added some natural coconut flavor (drops). Always make sure to use natural flavors, as artificial ones can leave a nasty after taste,which can ruin your product. I used two tea spoons to spoon clusters in mini paper baking liners and let them set in the fridge. The kids (and their parents absolutely loved them!)

Milk Chocolate & Orange Clusters and Dark Chocolate & Coconut Clusters

Then I went on to making Chocolate Covered Pretzel Stars Of David. I bought the short stick variety and basically stirred them into 10ogr of melted dark chocolate (it works just as well with milk or white chocolate) and arranged the sticks into star shapes on greaseproof paper, sprinkled them with colored sprinkles and let them set in the fridge. They looked amazing and tasted great! I will be sure to make these again very soon.

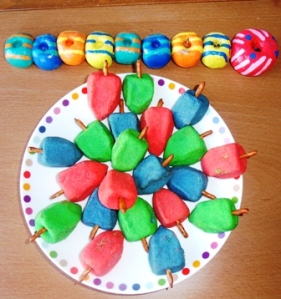
Then the serious work started. I decided to make dreidel shaped cookies.

I used a very simply recipe from a beautiful book I received as a gift from my sister a few years ago.

To make 2 dozen Dreidel Cookies (depending a bit on the size of the dreidels), you will need:

1/2 cup softened butter

1/4 cup sugar

1 1/4 cup flour

Food coloring

1 Preheat Oven to 180° C (300° F)

2 Cream butter and sugar

3 Add flour and mix well

4 Divide into 3 or 4 pieces, adding different food coloring to each part. The more coloring you put in, the brighter the cookies will be obviously. Also the color of the dough gets more intense while baking, so make sure not to add too much (I overdid it a bit with mine I think)

5 Chill the dough in the fridge, so it is easy to work with.

6 Form dreidel shapes using your fingers and the straight edge of a knife. I made mine by starting off with making a cube and then shaping the tip on one side. The book says to use wooden skewers, covered with dough to form the top, but I think that is a very dangerous thing to do, so I pushes small pretzel sticks in the top instead.

7 Chill at least 30 mins before baking (this is so you won’t lose the shape of the cookies during baking)

8 Bake for about 25 mins (depending on the size of your dreidels

Even though this is a very simple recipe, the cookies are very tasty and buttery! If you want a more interesting flavor, you can always add the rind of a lemon.

The other day I received another request from hubby to bake something for work. His old department were throwing him a farewell party to wish him good luck on his promotion. As his work is not around the corner, I wanted to bake something that ‘travels well’. I also wanted to bake something I hadn’t baked before and that would be a bit unusual for Israeli standards. So I looked in my Taste of Home Cookies book and found a great recipe for Chocolate Peanut Butter Brownies. Something a bit different, but at the same time a taste that most everyone loves. I’m not too crazy about the combination of peanuts and chocolate together, but then I wasn’t baking for myself, was I? The fun part of baking these brownies was that part was made in the oven (the brownie part, about 60% of the total mass) and part in the fridge (the top layer of peanut butter cream, about 40% of the total mass). It was a first for me to bake in this manner, so I really enjoyed the experience of doing something new.

Chocolate Peanut Butter Brownies

Unfortunately, I did not get to taste it myself, (I would have liked to despite not being a big fan of the combo pb and chocolate) but I got great feedback  and people absolutely loved it! So another success story in the bag. By the way, as a twist I added some raw thina paste to the peanut butter cream, which gave it a deeper and more layered flavor.  I don’t know what it is with me, I just find it very hard to completely stick to a recipe and not add my own ideas.


I always love doing a bit of baking before the weekend. It reminds me of my childhood. My mum used to bake us something every Friday while preparing Friday night dinner, (being Jewish this is most important family meal of the week) filling the house with the familiar sweet smell of the start of the weekend. Three childhood favorites stand out: cherry crumble pie, chocolate marble cake and vanilla cream filled profiteroles.  As children my sister and I could hardly wait for the marble cake to cool down and often managed to convince mum to cut us a piece as it came straight out of the oven.

This morning though I decided to try something new and went for baking Banana Nut Brownies. Not only was this an extremely quick and easy recipe, I also liked the fact that this brownie recipe is made with butter instead of oil (which I feel can leave brownies lacking in flavor) and required relatively little of it.  When I mashed the banana, I ended up with more than the 1 cup the recipe states (I think I had about 1.3 cups), but I added it all in, which turned out great as it really gave the brownies a nice banana flavor.  Walnuts are of course always a great addition to any baked goods containing either chocolate or banana, but as they are quite mild in flavor I do feel that the recipe could use another ingredient to give it some more depth taste wise.  I was thinking a hint of ginger would go great with the taste of the banana’s, but it’s quite an unusual combination with chocolate. Still I think it would work. Alternatively, it could be nice to stir half a cup of raisins in or top the brownies with a coffee chocolate frosting.

These fluffy brownies will definitively be a success with anyone who likes bananas and/or  is not keen on an overwhelming chocolate taste in baked goods.

One thing is for sure: my 2.5 year old absolutely loves them!

What a great day to decide to start writing a blog about baking cookies.

I sure have plenty to write about.

My day started something like this: Around 9:30 am my husband announces that he needs ‘something nice’ to bring to a meeting for work.  This meeting includes around 25 people and he needs it by 5pm as he’s working the night shift that night. Okay, great! I just received two amazing baking books I recently ordered and I was itching to try out some new recipes. Both these books, by the way, are absolute gems for anyone who enjoys baking cookies, bars and brownies! Then I all of a sudden remembered that I promised to bring desert to a family dinner tomorrow, but that was okay, because my 2.5 year old had already promised himself yesterday that he was going to ‘bake cookies’ with mommy. Basically, this means that I bake and he samples all the ingredients. Apart from when we do rolled sugar cookies. He’s not bad with a cookie cutter and sprinkles for a little fella his age! No problem, I would bake hubby’s goodies in morning when above mentioned little fella was at daycare and I would bake cookies in the afternoon which could double as desert for the family dinner. Everything under control! The only issue in this scenario was that it left me precious little time to get any of my work done (I work online from home) but I would make up for it some other time.

Now unfortunately I broke my camera, so I have no pictures of this morning’s results, but I can guarantee everything just like the pictures I found that’s connected to the book (Taste of Home Cookies) I used! I baked fudgy brownies with chopped walnuts inside

Fudge Brownies

and chocolate chips on top and gingery pear bars on a crumble cookie base. Both left the house with a corner missing 🙂

Pear Bar Cookies


For the cookies I decided to go with Betty Crocker’s Cooky Book and went for the Chocolate Crinkles and Chocolate Mint Sandwich Cookies, which I suspect will come out looking like the picture below.

Both these recipes require for the dough to chill in the fridge overnight (clever little trick of mom to divide the work over 2 days 😉 ), so tomorrow we’ll happily continue and hopefully I will find a way to take some end result pics!


Baked and eaten

Enter your email address to subscribe to this blog and receive notifications of new posts by email.

Cookies by Category